Guide
Heart rate scene
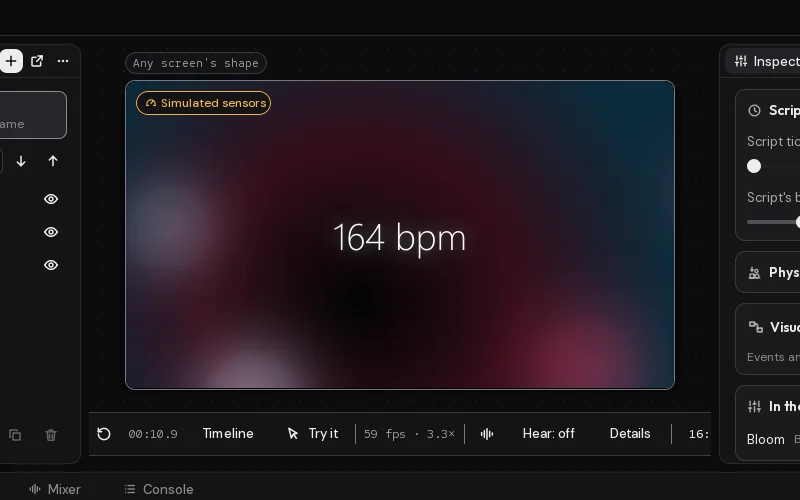
You'll end up with a wallpaper that follows your heart: soft lights that pulse faster as your heart rate rises and warm from blue to red, with the number itself in the middle. The reading comes from a watch through Motion Hub. I show it as a script and as a graph.
What you'll learn
- How a scene listens to a sensor on Studio's Sensors tab, and a Text layer shows its reading as
{pulse}. - How scene.on with
"sensor"hears each new reading a watch sends through Motion Hub, with the sensor's id and its value. - How to turn a heart rate into a number from 0 to 1 with scene.clamp, and use it to pick a colour between blue and red with scene.mix.
- How the graph looks instead of listening: once a second it checks Get Sensor Reading and only goes on when a reading has come.
What you need
- A watch or device sending
heart_rateto Motion Hub, and a token for it in Motion Player's Settings › Sensors (see Sensors and watches). No watch yet? You can still build it: until there's a token, Studio's preview makes up the readings. - A Gradient named Sky, Style Round, First colour
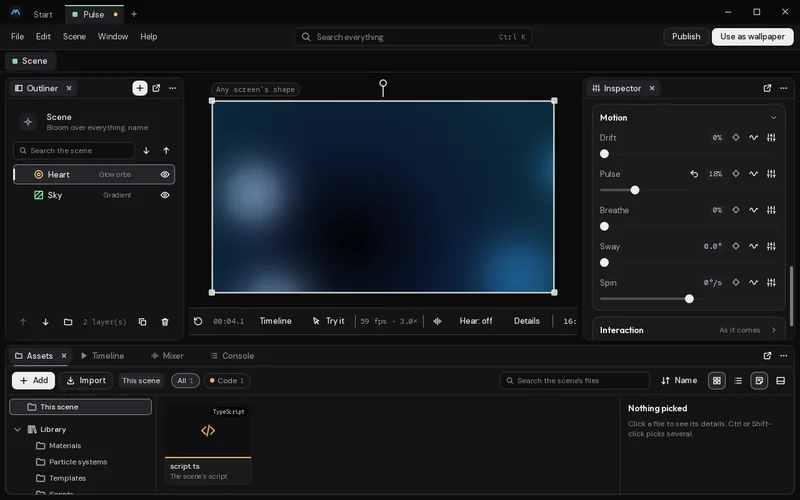
#020306, Second colour#0b1a33. - A Glow orbs layer named Heart:
| Setting | Value |
|---|---|
| How many | 4 |
| Size | 32% |
| Wander | 0.15× |
| First colour | #3aa0ff |
| Pulse (under Motion) | 18% |
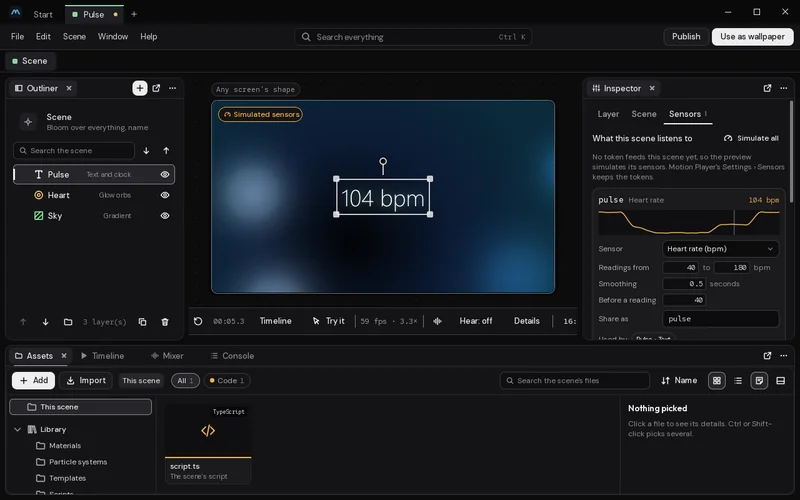
- The scene listening to heart rate, on the inspector's Sensors tab:
| Setting | Value |
|---|---|
| Sensor | Heart rate |
| Readings from | 55 to 170 |
| Share as | pulse |
- A Text and clock layer named Pulse, for the number on screen: Text
{pulse} bpm, Size 12%.
Listening to heart_rate is what brings its readings to the scene, the script included. The script moves the orbs' Tempo (tempo) and First colour (colour), and the sky's Second colour (colour2).
How it's built
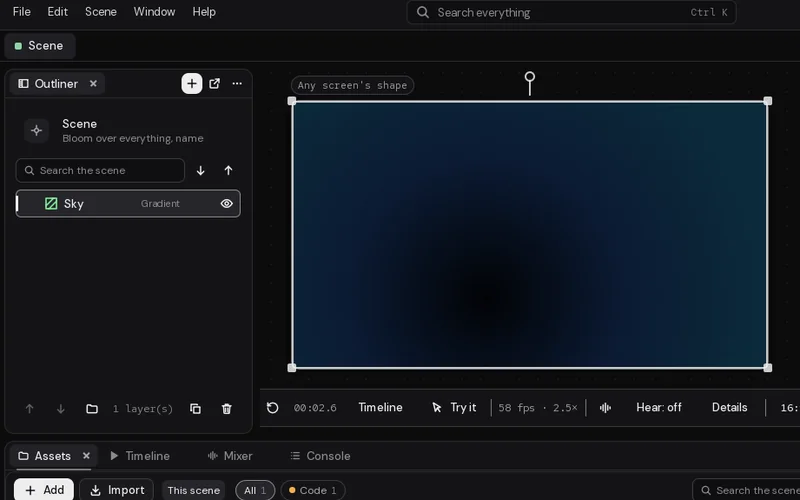
- On Studio's start page (Ctrl+N brings it back), click Empty scene under Start something new. It comes with a few layers to start from; delete them (pick each in the Outliner and press Delete). Add a Gradient with + in the Outliner's tab, and call it Sky (double-click its name).
- Add Glow orbs, call it Heart, and give it the settings above. Pulse is in the Motion group, folded at first.
- Click the Sensors tab at the top of the inspector, then Listen to a sensor. Pick Heart rate under Sensor, set Readings from to 55 and 170, and write
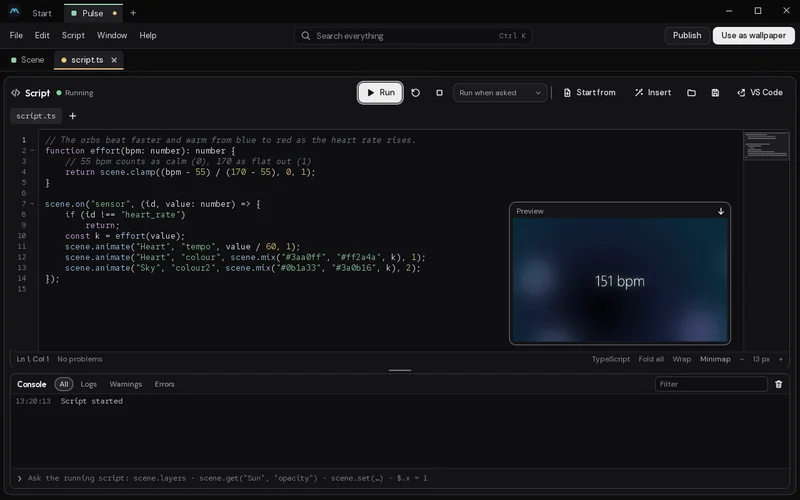
pulsein Share as. Then add a Text and clock layer, call it Pulse, and set its Text to{pulse} bpm(Insert a reading under it puts{pulse}in for you) and its Size to 12%. Back on the Sensors tab, Used by lists it. The scene reads the watch whose token Motion Player gives it. - Pick Scene at the top of the Outliner. For the script: on its Script card (click the card's title if it's folded) click Open the editor, or press Ctrl+Shift+E. The script opens as the
script.tstab, in the row under the toolbar; paste the script below. For the graph instead: click Start one on its Visual script card, and the Event graph tab opens. Build the graph below there, pressing Tab to add each node. - Click Run, then the Scene tab to go back to the preview. The readout shows the latest reading as soon as one comes, and the orbs follow. With no watch, the preview says Simulated sensors in its corner; to choose how the made-up heart rate goes, open the inspector's Sensors tab and set
pulse's pattern to Activity loop.
The code
// The orbs beat faster and warm from blue to red as the heart rate rises.
function effort(bpm: number): number {
    // 55 bpm counts as calm (0), 170 as flat out (1)
    return scene.clamp((bpm - 55) / (170 - 55), 0, 1);
}

scene.on("sensor", (id, value: number) => {
    if (id !== "heart_rate")
        return;
    const k = effort(value);
    scene.animate("Heart", "tempo", value / 60, 1);
    scene.animate("Heart", "colour", scene.mix("#3aa0ff", "#ff2a4a", k), 1);
    scene.animate("Sky", "colour2", scene.mix("#0b1a33", "#3a0b16", k), 2);
});
The graph
The graph leaves the sky out to stay small. Add a third Move Layer Setting To after paint for it, with its own Lerp Colour.
How it works
Readings come through Motion Hub each time the watch sends one. scene.on with "sensor" runs for each new one, with the sensor's id and its value. The script ignores anything that isn't heart_rate.
effort turns the heart rate into a number from 0 to 1 with scene.clamp: 55 or less is 0, 170 or more is 1. scene.mix then picks a colour that far between blue and red, and scene.animate moves there over a second, so a jump in the reading doesn't snap the colour.
Tempo is how quickly a layer drifts, pulses, breathes and sways. Dividing the heart rate by 60 gives about 1 at rest and nearly 3 when you're working hard, so the orbs' Pulse quickens with you.
The graph looks instead of listening. Get Sensor Reading always holds the latest reading, and its Has One pin says whether one has come yet. Once a second, On Timer goes through a Branch that only lets it on when there is a reading, so the orbs aren't sent to a tempo of nothing before the watch has said anything. Divide gives the tempo, and Remap Clamped does what effort does, ready for Lerp Colour. Moving a setting to where it already is changes nothing, so the seconds when the reading stays the same cost nothing you can see.
Make it yours
- Your own words around it.
{pulse}goes anywhere in a Text and clock layer's words:♥ {pulse}or{pulse} beats a minute. Its Before a reading is what it shows until the first reading, and Decimals how many places the reading has. Or callscene.setVar("bpm", Math.round(value))in the script and write{bpm}in the text. See scene.setVar. - Someone else's watch. Their token goes in Motion Player's Settings › Sensors, and the scene's page there, under Whose sensors, picks it. The scene stays the same.
- Another sensor. Anything on Motion Hub works the same:
steps,spo2, or your own, such ascustom.mood(Custom…, at the end of the Sensor list). Listen to it on the Sensors tab. The function is also given when the reading came and the name it's shared as: write it as(id, value: number, at, name) =>. - What it was last time. scene.sensor gives the latest reading at any moment,
{ value, at }, ornullbefore the first one comes.