Your first scene in Studio
This page walks through making a wallpaper from nothing to your desktop: open Studio, start a scene, add a layer, change it, make something move, and put it on your desktop.
Open Studio and sign in
Open Motion Studio. You don't need to sign in to make a wallpaper; a Motion Hub account is only for sharing it on the Hub later.
Start a scene
Studio opens on its start screen. Under Start something new, click Empty scene.
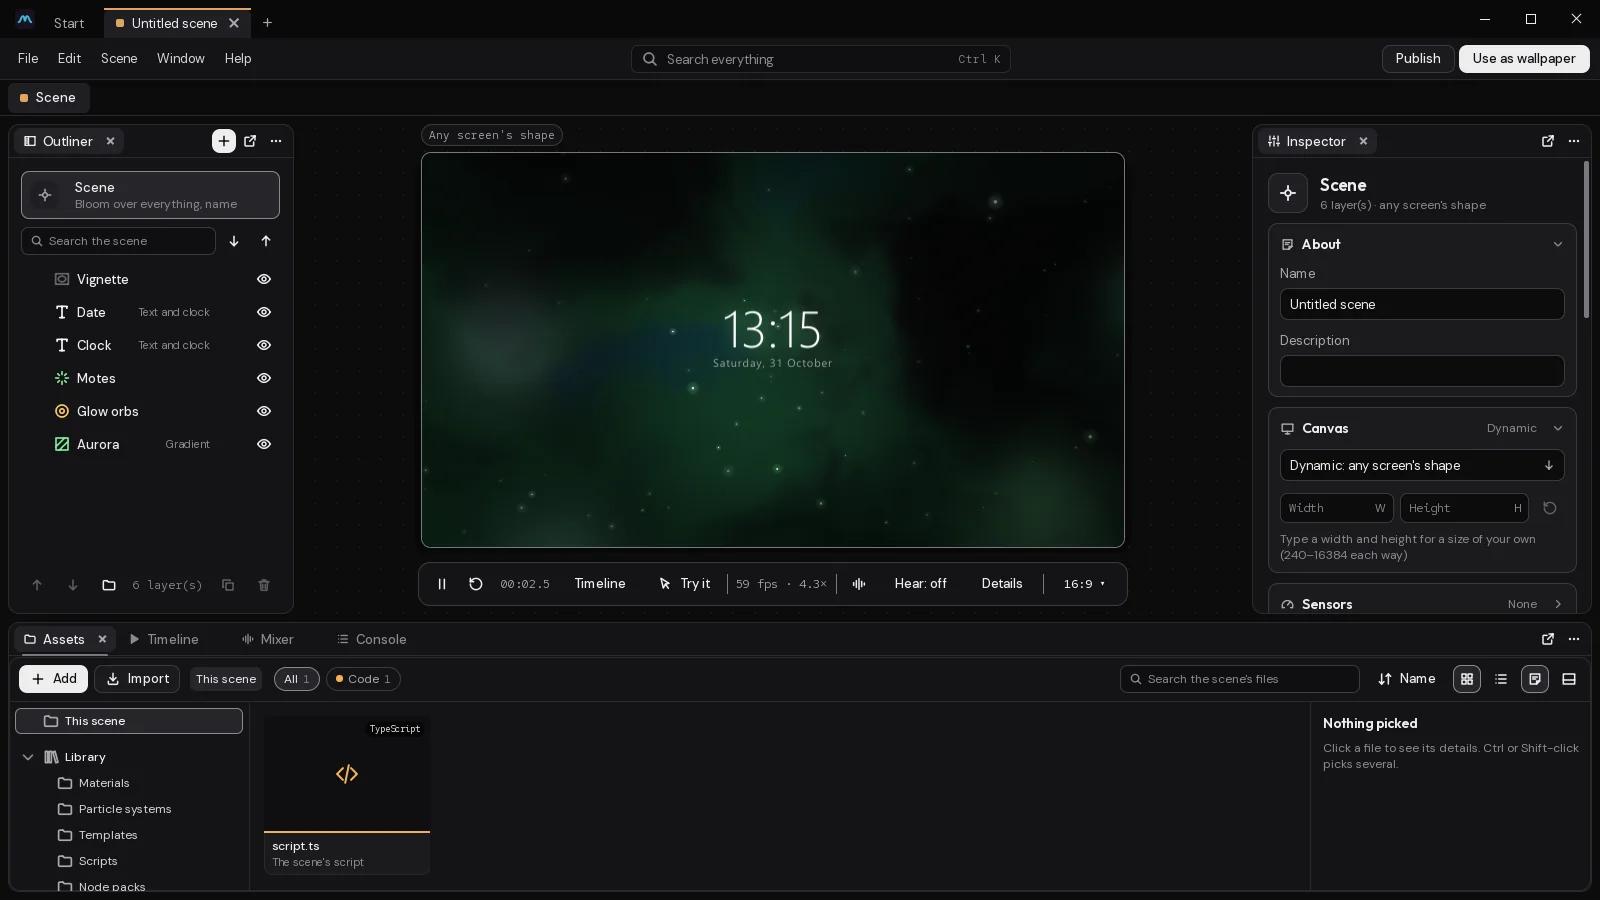
A new scene opens with a few layers to work from: an aurora gradient, some glow orbs, motes, the time and date, and a vignette. Delete any you don't want (pick it and press Delete).
The window has three parts:
- On the left, the Outliner: the scene's layers.
- In the middle, the preview. It draws the scene just as Motion Player will, so what you see is what your desktop will show.
- On the right, the settings of whatever you've picked.
Studio's window has the rest.
Add a layer
- Click the + in the Outliner's tab (Add a layer).
- Type what you want into the search ("rain", "clock", "stars"), or pick a category down the side.
- Click a tile to see what it is, then click Add (or double-click the tile, or press Enter).
The new layer goes above the layer you had picked. The panel tells you where before you add it ("Goes: Above ..."), and how heavy the layer is to draw.
Layers stack like sheets of paper: the top of the list is in front. See Layers and folders.
Change it
The settings on the right are in cards: the layer's own first, then Layer (opacity and blend), and the folded ones every layer shares (Placement, Motion, Interaction, Mask). Click a card's title to open or fold it.
Drag a slider and watch the preview change. Double-click the number beside a slider to put it back to its default.
You can also move the layer on the preview itself: drag it to move it, drag a corner to size it, drag the round handle above it to turn it. Hold Shift to stop it snapping.
Make something move
Beside each slider are small buttons:
- The wave makes the setting move on its own, back and forth, or follow the music.
- The diamond adds a keyframe on the timeline.
- The sliders icon offers the setting in the wallpaper's settings, so whoever uses your scene can change it without opening Studio.
Try the wave on a layer's Opacity: it starts moving between its value and another one every six seconds. Keyframes and the timeline explains both ways.
The scene itself
Click Scene at the top of the Outliner. Its settings are the ones for the whole wallpaper: its name and description, the bloom over everything (Bloom), and the Finish (hue, contrast, film grain, scan lines). Rename it there; its tab shows the name.
Save it
Press Ctrl+S, or pick File › Save. While there are changes, the scene's tab has an amber dot; once it's saved, the dot goes and Saved shows at the top of the preview. Studio also keeps a copy as you work, so if it stops before you save, it offers that copy the next time it starts.
Your scenes live in %LOCALAPPDATA%\motion\scenes on Windows and ~/.local/share/motion/scenes on Linux.
Use as wallpaper
Click Use as wallpaper at the top right. Studio saves the scene and puts it on your desktop. With more than one screen, it asks first: On every screen, Across all the screens, as one picture, or only on one of them.
Keep editing, and click it again whenever you want the desktop to catch up.
When it's ready for other people, Publish sends it to a .motion file or to Motion Hub: see Publishing.
Last changed 2 November 2026. Something wrong here? Tell us.